Saturday, 31 August 2013

PCB Bench Tested

This morning was spent reassembling the PCBs back into the base - I wanted to power up again and verify everything is still working :


I've backed the voltage down to 12v - the prototype was designed around 12v source - not 15v as is the case with production models.

All the motors are still spinning, which is a result !   I might have buggered my computer interface, but at least I have manual control.  Yep, the pessimistic approach is always the best, and maybe I'll just be pleasantly surprised later...

The only part of the circuit I haven't traced is the hand controller itself - basically, it routes clock signals generated by the 555 timer (IC6) to the motor drive logic, and sets direction to be clockwise or counter-clockwise into IC1 and then onto the drive circuitry....


The toggle switch (top-center) switches between computer, or manual control.  The LED barely illuminates on my controller - suspect the current limiting resistor is not quite right, there is no mention of it in the original circuit diagrams.


The motor control switches are all double poll, double throw.... I labelled mine up before reading the manual and assigned numbers to each stepper when I started stripping things down... I will renumber these to match the suggested channel numbers later.

As you can see, the controller is quite busy, but I can assure you it's rather simplistic.  If your missing a controller (and you have a prototype model), it would be quite possible to make one of these boxes.   If there is enough interest later, I'll draft up a circuit diagram and bill of materials.

Last test for the day...   Check the power line on the computer interface is outputting 5v, and although I didn't have enough hands to take a picture of this... 5volts it was!


But, discovered a  problem with the gripper motor - it's certainly spinning all right, but always in the same direction, regardless which way I throw the switch.   Looking back at the videos made earlier this month, It's debatable this was working correctly then....   So, I think what I'm going to continue with my program of getting the mechanics sorted first, start work on computer interfacing and programming, and will come back and debug this later....

Last week I also bought a dedicated 12v power adapter, I'm going to chop off the power connector and solder up the GX-16 connector I have for plugging into the Armdroid.   The reason for doing this is because when fully restored, I want to demonstrate the robotic arm outside my home environment, and thought the bench power supply would be a tad finicky for this purpose.

Next, will be making up the computer interface cable, and am one step closer...


Friday, 30 August 2013

PCB repaired....

... Well, I think it's repaired!


Last night I started the repairs to the PCB, and everything went very well indeed.

I used Electrolube Silver Conductive Paint to repair the broken PCB track.  I've never done this before, but after the paint dried - a quick test with the multi-meter told me I have continuity, but lots of resistance.  I used a very fine modelling brush to apply the paint, and this is what it looked like after that first coat:


I was pleased with the results.  If you click on the picture to view full size, you can actually see where the cuts had been made with a knife, and the paint has ran into these crevasses.

This morning, still not being happy with the multimeter readings, I decided that when I get home tonight to apply a second coat, and everything will be fine...   And so that I did....

But disaster soon followed......

This time, used masking tape and mask off the areas not to be painted, and guess what happened... the conductive paint ran straight into those crevasses, under the masking tape to make the best possible electrical connection with every track next door!!!    I can tell ya, blue language was to be heard for miles!!!

Luckily, I had pulled the tape back in good time to see how things was looking when this was drying - I quickly grabbed a bottle of Meth Spirits and wiped off the excess... what a bloody mess.... I lost a number of Heart Beats during all this.  I was making continuity with the surrounding tracks, which is the last thing I possible wanted!

Rather embarrassingly, after cleaning  - this is what the board looked like:


As it would turn out....  According to my multimeter readings I'm not dropping any resistance now -  look at the width of the track repair, that's probably the reason why!   Might not look elegant, but I think she'll hold captain...  And, if not, I'm cutting the bloody track away myself!

I think moral of this story - try on a scrap circuit board first, otherwise the circuit board might have to be scrapped!


More successfully however was bonding the heat sinks back onto the power MOSFETs that previously came loose...  I used a good quality silicone adhesive with excellent thermal sealing properties :


Just need to get this lot back into the base, and that hopefully completes this part of the electronics....

Wednesday, 28 August 2013

Caught in the Act

My wife thought the house was strangely quiet this evening, so she came upstairs and caught me right at it....


...I was busy ohming my way around the circuit boards - giving myself a little orientation what track links where, and matching everything up to the circuit diagram.


Here's what happened before that interruption....

I reopened the base, and marked up the big jumble of cables and took plenty of photographs (makes putting back much easier), then gently removed the circuit boards from the base plate:


I took this picture to remind myself which way the microswitch sensors go:


The right-most cable is the Base motor sensor which should equate to MS6, but I need to verify that, so don't take my word for it, just yet!   It's a bit difficult to know what the other sensors are with the arm in total pieces!

Dismantling the circuit boards:


You can see the arm is not only dismembered, but pretty much dissected now !

and Tracing finally begins...

I printed out all relevant data sheets to help because the circuit diagrams are not very clear to read pin numbering.

A couple of minutes in... discovered what that broken track is all about...  it's the +5volt power line!  Still no idea why it's been cut mind you!

Yesterday, I bought track repair paint - I was going to buy a micro-tipped pen to do this repair - but at £40 I thought better of it!  Anyway, now the track has been identified, I will repair this before closing up the base...  hopefully tomorrow evening.

I have now traced half of the data bits through from the initial buffers all the way to the high power motor drives.  This information will make computer programming a doddle as I have removed a good number of unknowns from the equation in doing so.  I'm making detailed notes as I go, and will probably at a later stage draw up new circuit diagrams to be published here.  I also know exactly what line is what on the computer interface port.

Pretty tired now, so I'm buggering off down the pub for a real quick one !!!

Sunday, 25 August 2013

Raspberry Jam @ Bletchley Park

This morning I arrived at Bletchley Park


The National Museum of Computing was holding their 14th, and one year's anniversary Raspberry Jam.  Special guest was Eben Upton, and for those who don't know - he's the guy who invented Raspberry Pi

The morning started with introductions, followed by an informative presentation by Eben :


It was great to hear about what's happening in the Raspberry Pi Eco-system, and achievements made in terms of shipment volumes over the past year...  A few hints was made about what to expect in future, and hopefully we'll be seeing more add-on modules to follow.

I personally liked hearing about how the Education world is starting to find these devices into class rooms, and what the teachers are doing with them.

During the break-out session, I managed to spend around 15mins chatting to Eben about how the projected all started, and why Raspberry Pi as the name was chosen...  Seems the computer industry just likes fruity names!

He was originally a software engineer at IBM Warwick... What a small world this is !!


People brought their Raspberry Pi based projects along...


Believe it or not... This is a Raspberry Pi internet enabled Enigma machine.  It's a faithful rendition of the original, expect encoded messages are transmitted over the internet for decoding elsewhere

Based on German Naval Enigma with 4 rotors - one of Bletchely Park's own working rebuilt Bombe machines has previously been used to crack a coded message produced from this machine.

This is one project that particularly interested me...


Sure did taste great, and compliments to the chef !

Next, we have an internet enabled environmental monitoring station - includes a bunch of digital and analog sensors to measure things like temperature, humidity, UV and light levels, which is then published onto a website...


Daniel brought along his Astro Blaster arcade machine restoration / conversion to table top form - seen here standing on side showing the internals through observation windows in the base:


A Raspberry Pi hidden inside is running MAME (multiple arcade machine emulation) which means he'll have literally hundreds of games at hand to choose from.


I was having Berry IO demonstrated here - a browser based GPIO controller for the Raspberry Pi.   Actually, this has given me an idea to try this out when the Armdroid is ready to be hooked up.


The arcade was connected to a large monitor in the room, and proved to be very popular with everybody... 

Space Invaders... You can't beat the old ones!

The Raspberry Pies certainly was going down well...


I didn't eat them all, honestly !


Enjoyed meeting everybody, and hopefully will see again sometime...  Discussing my project with the experts, was soon pointed out I might have some challenges generating those clock pulses reliably on these little devices...

Information on Milton Keynes Raspberry Jams can be found at their Forum

This inspired me to go home, and get on with my Armdroid project...  Hopefully,  we'll have something to demonstrate soon!  The house redecorating is nearly finished, so more time will soon be allocated to getting things sorted here.

Enjoy the rest of your Bank Holiday....

Saturday, 24 August 2013

Interface "How it works"

In my last update, I explained how my Armdroid's circuit was identified as a prototype model.

I'm going to now describe how this works and the differences to standard production models, and what this means to the controlling software.   This update may not capture every detail, but everything will fall out in the wash later...

The interface, as we all know is designed around a standard eight bit bidirectional parallel port, which may be latched or non-latched.  This is similar to production models but there are subtle differences to note...

When the port is operating in output mode (data transmitted from controlling computer), the port is configured as follows :

D8    X2
D7    X1
D6    CCLK
D5    CDIR
D4    A3
D3    A2
D2    A1
D1    OUT (LOW)

Output Bits
X1, X2 unused (could be used with CCLK, CDIR for direct stepper drive)
CCLK clocks driver circuitry
CDIR gives motor direction

A1, A2, A3 motor address
OUT indicates data to travel from microprocessor (logic low)

The first four bits (D1 - D4) are roughly the same as production variants.  I say roughly because reading on the internet appears to be discrepancies, but as far as I'm concerned they are the same.

When the stepper motors have been connected up using the suggested channels, the motor addresses (A1 - A3) relate to these functions:

000   x  (not used)
001   Gripper
010   Left Wrist
011   Right Wrist
100   Forearm
101   Shoulder
110   Base
111   x

The next four bits however are totally different....  On the production models, the controlling computer is responsible for issuing the stepper motor step pattern.  This requires 4-bits to encode North/East/West/South and other combinations.  But on my prototype model, only 2-bits (D5 - D6) are used, and the remaining bits are not used.

As you may recall I said my circuit is complicated... This is because it includes it's own Stepper Motor Control Logic.  In my case, to drive a motor, I need to set the address, the direction (CDIR) to specify clockwise, or anti-clockwise rotation, and then provide a clock pulse CCLK to run the motors.   The timing of this clock relates to motor speed.

I noticed it would be impossible to half-step the stepper motor using this arrangement because we have no further control of the stepper control logic.

But, there is another dimension to this...   The output bits X1, X2 can be used to bypass the on-board stepper motor control logic.  In which case, it's possible to remove ICs 1, 2 and 3 which are redundant in each motor drive section.  This means, the motor drive control will then be exactly the same as production models.  So, I really get the best of both worlds...  More on this later...

So, what does all this mean for the software?   Naturally, the signals required to control the Armdroid using the stepper motor control logic (prototype) is completely different to that of direct control (production models).  But, this difference could be abstracted in the software drivers, meaning Applications could work regardless of the model used - admittedly, there would be some restrictions, but gives greater flexibility.

Anyway, back to the interface... finally, when the port is operating in the inverse input mode, the configuration is as follows:

D8    MS6
D7    MS5
D6    MS4
D5    MS3
D4    MS2
D3    MS1
D2    U1
D1    IN (HIGH)

Input Bits
MS1 - MS3 micro switch inputs
U1 user defined (not used)
IN indicates data to travel to microprocessor (logic high)

I don't think there is any difference here to production models.

There isn't a great deal of information about sensor wiring, I'll re-arrange mine to have MSx relate to corresponding stepper motor channels 1 - 6  if they are not already like this!

One last thing I couldn't figure earlier this week - how the production models could possibly use a manual controller?   I think the answer is...  they don't !

I'll be opening up my base another day, will remove the jumble of wires and extract both circuit boards.  I want to identify by ohming the circuit what that broken track is.  I also want to identify if D1 is the right-most contact, or left-most when looking directly towards the edge connector.  This orientation will really make life a lot easier when I come interfacing...

You may have seen elsewhere on the Blog the new Resources section - I'm going to keep this updated with circuit diagrams, data sheets, and information to help you get your Armdroid up 'n running.  If you have anything to contribute, please do send me a message....


Tomorrow, I have been invited to meet Liz and Eben Upton, founder and trustees of the Raspberry Pi Foundation at Bletchley Park, Buckinghamshire, which I'm pretty excited about!   I'll be taking my camera along and will update the Blog later over the Bank Holiday weekend...

Tuesday, 20 August 2013

Circuit Board Mystery

Think I've just made a discovery....

I previously commented about my circuit board not looking anything like what's covered in the manual....

The manual describes the interface circuitry using TTL logic chips (7400 series), and all seems relatively simple.

My Armdroid on the other hand uses CMOS (4000 series), includes a 555 timer, has completely different high power drives, and appears overly complicated in comparison.

I happened by chance to read the original Armdroid article published in ETI magazine, Sept 1981 at Alex Zivanovic's excellent website  - and it would appear my circuit board is in fact a "prototype" model

My upper and lower interface boards (click to see full size) pictured when base was opened earlier :


Compare to these pictured (dusty,but still recognisable) :

http://www.senster.com/alex_zivanovic/armdroid/UpperBoard.JPG
http://www.senster.com/alex_zivanovic/armdroid/LowerBoard.JPG

Alex then mentions he has no other information on this variant.

The article refers to this Armdroid as a prototype and the circuit diagrams accurately reflect my layout and components:

Motor driver interface (see figure 8)

Interface board (see figure 4)


Just how many prototype verses production models exists, or other variants - I don't know!   Doesn't seem to be any other information on the internet about the prototype.

At least I finally have a circuit diagram - will make life a lot easier identifying and repairing that broken track, which is another mystery.

Found this picture of what I think is "standard production" and matches the layout in the manual and blueprints:

http://robosoc.blogspot.com/2011/09/armdroid-part-1.html

This is starting to make a great deal of sense...  I was puzzled for hours trying to figure this out!

You can see there's a big difference between the prototype and production boards.  The power regulator on my model is bolted to the chassis, whereas it's mounted directly on the PCB here.  The 555 timer that provides a manual (not computer controlled) clock pulse, is simply not present on these models.


If you have anything different, please let me know, I would be very interested to see what other revisions are out there!  Better still...  If you have a broken or unwanted production board, I'd be very interested in it!

I also wonder if this makes my Armdroid a little rarer ?


WARNING:  If you open up your Armdroid and have one of these prototype boards do take precautions for handling the static-sensitive devices.  The CMOS ICs are particularly sensitive and easily damaged !

Sunday, 18 August 2013

It Works !!!

This Armdroid has not been powered up for at least 15 years, and I wanted to see what state things are in....

Connected the Armdroid to my Bench Power Supply - unfortunately, I don't have an original power supply, voltage was set around 15v and switched on :


Armdroid connected to bench power supply

Armdroid connected to bench power supply

No smoke,  a promising start...

You can see the arm is still dismembered for re-stringing and repairing mechanical problems.

You'll notice when the motors are ideal, little more than 3Amps is drawn - this actually drops when motors are spun because of the fact they are always energized:


Temporary connection made to the Power Connector terminals :

Armdroid power connection

A discussion on the power connecter can be found at the Society of Robots
I was amazed to find out Maplin actually stocks something useful !

Hand controller connected, cable clamps prevent accidental pulling out - an enhancement made by the University and seems a sensible idea :

Armdroid hand controller connection


And so here we go....


All stepper motors responding to Hand Controller

I put stickies on the motor shafts in this video - makes things easier to see what's happening:


Friday, 16 August 2013

Pulleys & Timing Belts


Apologies for not updating any time sooner... It's been a seriously hectic week


Collected my package last weekend...  And, as anticipated, it was my SparkFun Electronics delivery from the USA...


Along with my ribbon cables and connectors, treated myself to this... which is the reason I got clobbered for that Customs Charge...

USB 2 SERIAL Cable Adapter by SABRENT

What's so special about this your probably wondering?  Well, I recently upgraded my PC, the new machine has no serial ports, and worst still.... came with Windows 8 !!!

I previously looked at purchasing a USB to RS-232 serial adapter earlier in the year, but none turned out to be compatible with Windows 8 (64-bit edition).  I later discovered, any adapter based around the FTDI chipset will work nicely....  So, when I spotted it here whilst shopping, I thought... why the hell not !

The cheaper adapters (at time of writing) sold elsewhere don't seem to support Windows 8.  A complete list of supported operating systems and specifications for the FTDI chipsets can be found on the manufactures website www.ftdichip.com

What's rather nice about this particular product - you can enumerate a serial device as a Virtual COM port, or make use of royalty free Direct Driver DLLs.  We could develop an Armdroid application in the Microsoft .NET Framework using the SerialPort class, or P/Invoke out to the drivers directly, and interact with communication methods to control the robotic arm.

I will in time develop an IBM PC compatible USB / Serial interface for Armdroid, and write the controlling software for Linux/Windows.   Initially, this will probably involve a PIC microcontroller converting commands sent via RS-232 to the Armdroid parallel interface.  I know there are a hundred ways to skin a cat... but a serial interface allows plenty of possibilities for interfacing other types of systems, and that's exactly what this project is all about!

Since upgrading my computer, I've not actually had time to re-install MPLAB (development software) to know if this is compatible - I'll have to keep my fingers crossed 'till then!   In the meantime... we'll be using that Raspberry Pi


And so to this week...

Tuesday, we headed back down to Davall Gears arriving late morning (I'm certainly no early bird you see) to collect all the parts ordered last month...

Replacement 14Tooth motor pulleys for Fore Arm and Upper Arm
 These guys will need boring out to 4mm which I believe is the diameter of the stepper motor shafts, then tapped.    Only two are required, but ordered a couple for spares, just in case!

Replacement 20Tooth motor pulleys for Wrist and Hand actions

Not actually broken on my Armdroid, but these are also for spares!

Timing belts (short, medium, and long):

New Timing Belts


Also got some freebies - might be possible to make use of these sometime:


Alloy 14T pulleys / 5mm Bore
20T pulleys with Alloy Collars / 6mm Bore

We then started discussing how to go about fabricating replacements for the broken reduction gearing pictured again here:


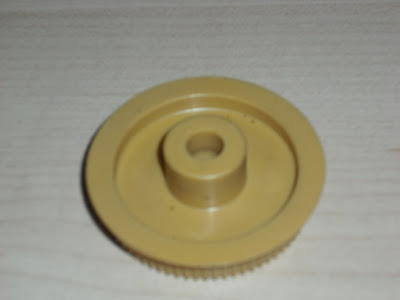
Here is the equivalent 72T / .080 pitch stock pulley (Front / Back) as it comes off the shelf:

Replacement reduction gear pulley

Replacement reduction gear pulley

As you can see, pretty close aren't they, possibly was the part used by Colne Robotics Ltd. in 1980's.   It's possible the other stock parts was also sourced here.

The inner 12T spur was identified as stock, but definitely modified.  We measured up, then Ian disappeared to do some calculations...


On his return, I was given two options - which incidentally looked identical in every respect, only to differ in the type of steel.   One option, required highly specialised equipment to machine, sadly this was rejected - it's unlikely our table-top lathe will cope.  The alternative had to be ordered in... yep.. you guessed it... USA again, oh boy !

It's a pity I didn't take any photograph of these spur gear options.  Will have to wait until my order arrives...

Basically, the gearing will need boring out to 6mm to accept the reduction gearing shaft, and also requires some form of knurling - almost visible in this picture:

As for the pulley - this needs boring out to accommodate the spur gearing around 11mm to maintain a very tight fit.


The back of the pulley needs machining - from 11mm as can be seen with the depth gauge :

to 3.22mm :


The spur gearing will then need to be pressed fitted into place.

My intention for now is to repair what i have... super glue it !  This will allow me to get the Armdroid up 'n running before Christmas!   Later on, this blog will cover the fabrication of this part in detail.  Maybe in time, we'll look at 3D printing, and other ways to make replacements.

Back to the day, we had lunch at the Brookmans Pub in Brookmans Park which is a real "gem" tucked away in a lovely location.  Might have been a busy week, but there's always time for liquid lunch...


Highly recommend if your in the area!   Food certainly was excellent, and made for a very enjoyable trip!   We parked next to a Ferrari - should have posed in front to pretend it's ours!   Nah, if it was a Lamborghini that would be a different matter...


Next time... should be the stepper motor bench test...  stay tuned!