Showing posts with label Armdroid String. Show all posts

Saturday, 8 March 2014

Final Assembly

This morning I started looking at what could possibly be causing tight spots on the upper-arm assembly.

Then suddenly spot luck (no pun intended)....  Picking up the assembly from the "donor" Armdroid, the shoulder spindle quite literally fell out.... On my other Armdroid, this was seized solid, and previously assumed this was meant to be fixed in place.  This made me wonder if this could be the cause of the problems....

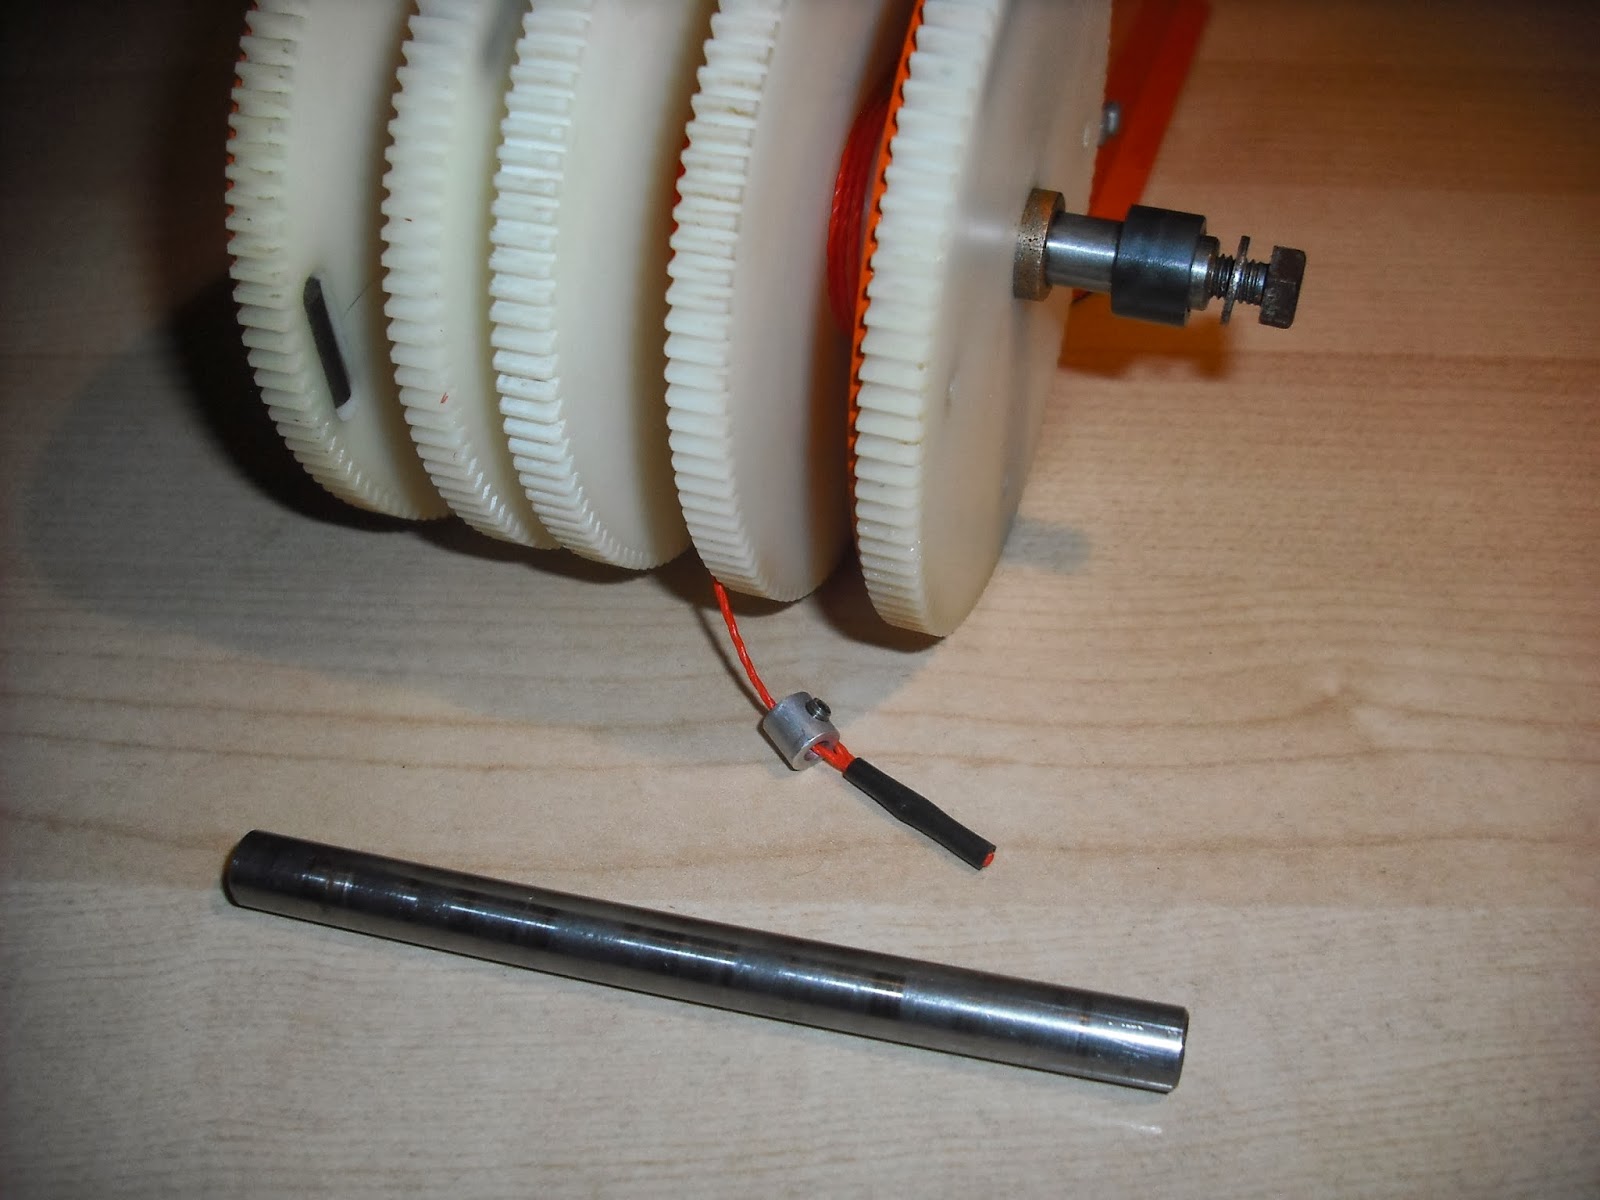
The spindle i'm referring too is the one pictured below extruding from the large drive gears:
Colne Robotics part no. 117 (8mm x 95mm / tapped with M5 threads)


I decided to take the spindle out and have a closer look what's happening:

By using the spindle from the donor, this was driven into the shoulder by lightly tapping with a small hammer, pushing out the spindle.  The idea was to keep all the spaces in place and not loose anything in the process.

There was some light rust which was rubbed down with Wet & Dry, then lubricated with WD-40.   This was then tapped back into the shoulder and with a little persuasion this has freed up nicely.

After aligning the gearing, I slowly and carefully eased the assembly back into the shoulder:


At this point, before bolting everything tightly into place, I checked for tight spots, and so far, everything is running freely.  I carefully separated the drums with a small screwdriver and squirted oil with my precision oiler between all drums/spaces/bushes.

Without power applied to the motors, it's very easy to manually articulate the arm checking for tight-spots.


Sweet... No tight spots, and no "clunks" coming from the gearing...  Things are starting to look promising!

I cannot recommend enough doing this yourself, if you have any problems with the upper arm movements on your Armdroid. If you don't have a spare spindle, any M8 bolt of sufficient length could be used to drive out your spindle.

All that's left to do now, is re-string the broken finger cable, and finally tighten and tension all controls...

When it comes to re-stringing, the best advice I can give is follow the blueprints.  Study the diagrams until you understand what string goes over or under each of the pulleys.

I popped down to my local Staples and asked them to print the blue-prints on A2 drawing size.  I found this made following the string routing much easier on the eyes.

You will need a very sharp pair of scissors to cut the Kevlar - you'll never believe it, but since last summer our best pair was struggling to make decent cuts without frying the ends.   Another tip - a very good pair of steal tweezers, the type surgeons use, and you'll have no problems at all, but be warned....   you need lots of patience, restringing an Armdroid is not the most pleasant of jobs.

Bull dog-style clips come in very handy....


The excess string will be left until final adjustments have been made.... but this just about completes all the mechanical work....

Roll on next weekend, and we'll see how this performs at the Peterborough Raspberry Jam.   I will be demonstrating the Armdroid at the Show & Tell.   That said, I had better blow the dust of my Raspberry Pi and start work making the Pi tell the Arduino what to do.....

Saturday, 21 September 2013

Rearming - Part 2

Nothing is particularly easy......

Having reassembled the arm, I soon discovered a serious problem...  The forearm and shoulder joints was completely jammed solid after a couple of turns on the motor pulleys.   It was not until the next day, I could see exactly what the problem was....  The reduction gears had been catching on the motor bolts.

I actually remember swapping these around the other month back to keep consistent with the blueprints:

DRAWING NUMBER  A2 / RB1 / 2

However, reading the manual, it's clearly printed in black & white "The bolts which are next to the reduction gears should be placed nut out to prevent the reduction gears catching on the end of the bolts."

The blueprints are wrong -  I've been finding plenty of mistakes with this drawings!


So, I had to once again, remove the arm, sensors, timing belts, reduction gearing, swap these bolts around, and start all over again....   hopefully, second time lucky....


Nut & Bolt swapped around as per the instructions :


Start of reassembly...

The reduction gearing was re-installed, and all moving parts lubricated with one of these precision oiler pens:


This time, I double checked every motor turned without any problems before lowering the arm into position.   I have slight play on the shoulder gearing which I suspect is a consequence of the hairline fracture.


Having then reassembled the rest of the Arm, I noticed from the exploded diagrams I'm missing a couple of washers - part number 120.  I really can't face taking this apart again, so I'm going to leave for now....


Gripper cable reattached to the tension spring mounted on the Shoulder Pan.


I also have been checking tension of all cables - left hand side wrist was loose, so a good pull with a pair of pliers and re-tightened grub screws did the trick!   Also cut away excess string leaving roughly 1cm in all cases for future adjustments.


Here are a few pictures of the Armdroid now :-


It's really exciting to see things coming together !


As you can see, just need to reinstall the reed switch sensors, and cable tie all cables back into position.

Turning all motors by hand, all joints appear to be behaving themselves, a little more lubrication will be applied, and hopefully, that completes the mechanics.

Saturday, 7 September 2013

Restringing - Part 3

Final day of restringing....

Using the old string as a guide, cut two new lengths of string for the fingers - one is doubled up, the other single, and both feed into the tension equalizer:


This was the tricky bit...  Clamping the string into place with these grub-screws which had a nasty habit of spinning and pulling on the string...  at that same time, keeping an eye on the lengths to ensure they are even.


I found a steel rod helped keep things in place until tightening.    Ideally, you need two Allen Keys for locking these grub screws - you tighten one clockwise, the other is tightened anticlockwise, and should counteract things.   I only had one, and certainly was a struggle!

With the equalizer in place, I could now make a start on the remaining string which is the grip action cable.


The gripper cable starts from the rear drum (locked by grub screw),  feeding forward, before returning to the idler pulley next to the drum where it all started:


The double ended finger string should be hooked around the smaller pulley, but kept falling off without any tension - will be sorted later


The end of the string will be hooked onto the shoulder spring, so I have simply clipped this to keep in place until then.  Masking tape keeps the reduction gear from rotating, and also keeps excess string out of the way.


Arm ready for installation:


Thursday, 5 September 2013

Restringing - Part 2

Tonight's restringing has been relatively uneventful....

The right hand side Wrist Cable is basically the inverse of the left hand side, and went in rather easily in comparison to last-night's performance:


Again, adjustments will probably be required when it comes to fitting the arm onto the shoulder, any excess string will also be cut away.


Next up....  Elbow restringing....

I couldn't use the existing cable as a guide because it was previously cut short and knotted in places, this was another reason the arm couldn't support itself.   So, what was left, was quickly removed:


Before attempting to fit the new string, I made certain the tension spring was securely fastened to the pillar (M3x10mm cheesehead plus 2x M3 full hex nuts)

Tied a small knot in one end of the new string, and crimped away.  It took a couple of attempts, but eventually got there....  I've never been a fan of these connectors:


After crimping, cable was cut roughly to length and bolted on, then stretched through to the drums at the rear - again, being careful not to cross or kink in the process:


 And neatly passes back over here to the front:


...before finally terminating at the spring pillar.  I made sure this was really tight, using a pair of pliers to get a good grip when tightening down the cable clamp.   The pulleys in the middle support the Gripper cable, which is the last string to be replaced.


So there you have it....

Both wrist cables are installed, and Forearm is now supported.   Tomorrow, we'll be installing the single/double Finger cables, and if time permits, the Gripper cable which then completes the restringing procedure.

Wednesday, 4 September 2013

Restringing - Part 1

Finally, I have started restringing my Armdroid....   It has not been without complications I can tell ya.....

The manual covers the stringing procedure (cable threading, pp 2-13 / 2-14), gives advise on the best order, some useful hints, and suggests threading is ideally done before bolting the arm into the shoulder - which eases access considerably:


Luckily... My arm is not currently installed in the shoulder in any case !

I decided it would also be good idea to remove the finger assembly, tension equalizer, and tape up any strings that might interfere with the new stringing.   I will start with the Wrist cables, before moving onto the Elbow, Fingers, and finally, Grip action cable.

But....  Trying to release the tension equalizer to release the fingers was a problem.... it wasn't coming out in a hurry, it was completely seized!

I couldn't get enough leverage on the retainer with my tools whilst still installed in the arm.  I had no option but to extract this component completely, and get the big guns (grippers) out on the case!

Couldn't quite make out from the blueprints how the finger cables are held in place - but after closer inspection discovered the cable is clamped by a pair of grub screws hidden inside the finger support on both sides:


The string pulled out after releasing these grub screws.


With the tension equalizer completely out and dissembled with Circlip pliers.  Liberally spraying WD-40 to penetrate, then with a pair of grippers wrapped by a cloth to protect the stub-axle, eventually the screw cracked...

I couldn't see any visible signs of corrosion, maybe it was glued in!

This picture shows how the tension equalizer is constructed:

And reassembly of the device:

The fingers are now completely removed from the arm, and will be strung later :


Remaining strings taped out of the way:


After final preparations, I was ready to start restringing the left hand side Wrist cable....  I made a number of false starts... what worked for me was starting at the very front, then working backwards....


I used everything possible to clamp the strings down to maintain tension as I worked the string through the next set of obstacles:


Next problem....  where had the tension spring gone?????

I then spent the next 1 2 hours searching my study looking for it... nowhere was it to be seen....  suddenly I spotted it... stuck to a reed switch magnet on the reduction gearing at the other end of the arm!  Having pulled it free, this was then installed as follows:


And eventually, persistence paid off....    SUCCESS


The excess string will be cut off during finally assembly & trimming


You can see the new Cable Camp being used here.  I still say, if you crimp it, your in for a world of hurt when it comes to tensioning.


 The string is looping around the drums and idle pulleys without any kinking or crossing itself....   Perfect!


I won't be surprised if the string needs some re-arrangement later, but basically, it's in place now and follows the blueprints exactly.   I am pretty happy with the result, but one thing is for sure....  You really need six hands, and four pairs of feet to do this !

Tomorrow, I will acquire a few extra 'bulldog clips' which should make life significantly easier when restringing the right hand side wrist.   If all goes well....  I might even make a start on the elbow cabling which on paper, looks a whole lot easier than the wrists!

If you've never done this before, like myself, then I would recommend buying a good pair of strong tweezers...  This is really fiddly stuff !